

Hanging instructions
Hang your picture.
From the fittings to the finishing touches, here’s how to use your hanging kit.
PFWHK02 · 19 piece kit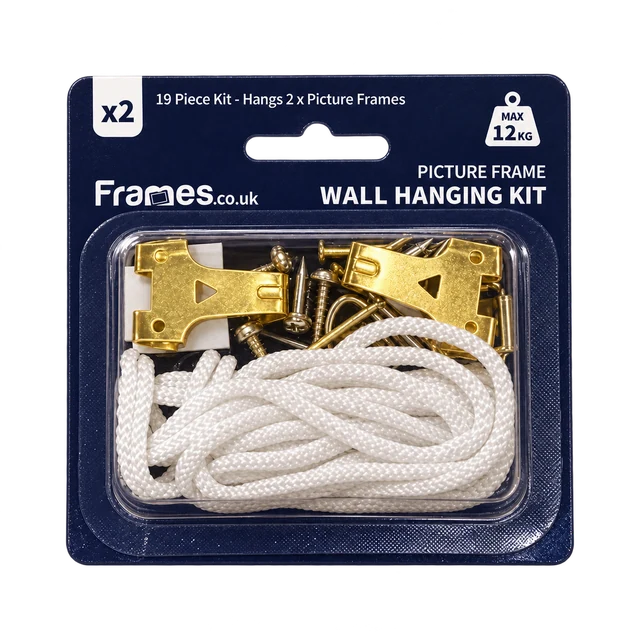
Everything in your pack
- 2Double picture hooks
- 4Nails
- 4D-rings
- 4Screws
- 4Foam bumpers
- 2mNylon cord
For two frames: use one hook, two nails, two D-rings, two screws and two bumpers per frame. Share the 2 metres of cord between them; measure both lengths before cutting.
You’ll also need a pencil, tape measure, suitable screwdriver, hammer, scissors and a spirit level. A wall detector helps check for hidden cables and pipes.
Before you start
Check the frame. Check the wall.
A sound wooden frame
The supplied screws attach the D-rings to the wooden frame moulding. Check it is deep and wide enough for the screws. Don’t screw into the backing board, glazing, or a metal or plastic frame.
The right wall fixing
The supplied hook and nails are not suitable for every wall. Plasterboard, masonry and weak or damaged plaster may need different fixings. Check for concealed pipes and cables before fixing anything.
Our recommendation Consult a professional picture hanger or qualified tradesperson before attempting to hang your picture yourself.
As marked on the packaging
Weigh the complete frame, including its glazing and artwork. The safe load also depends on your wall, frame and installation. Never exceed the lowest rating of any part; don’t assume the supplied nails will hold 12kg in your wall. Unsure? Ask us before hanging.
Step by step
Fit your hanging kit
Follow these steps for each frame.
-
Attach the D-rings
Lay the frame face down on a clean, soft surface. Mark matching points on the two side mouldings, about a third of the way down from the top.
Position the D-rings facing inwards. Check the screw length against the wood depth, then fasten each ring with one screw. The screws must grip firmly without coming through the front or touching the glazing.
Already has suitable D-rings? Check they are secure before using them.
-
Fit the cord
Thread the nylon cord through both D-rings to make a loop. Leave enough cord to tie the ends securely, with a little slack across the back of the frame.
Pull the joined cord up at the centre. It should stay below the top edge of the frame, so the hook will be hidden. Check that the knots cannot slip before hanging.
Don’t cut the cord to length until you have allowed enough for the knots. If you’re unsure how to secure it, contact us before hanging.
-
Find the hook position
Hold the frame where you’d like it and lightly mark the wall at the centre of its top edge.
With the frame back on your soft surface, lift the cord at its centre. Measure from the top edge down to that point. Measure the same distance down from your wall mark.
This marks where the cord rests on the hook, not where the nails enter the wall.
-
Fix the wall hook
If the supplied hook is suitable for your wall and frame weight, place its cord-supporting point at your mark.
Insert both nails through the hook’s guides and gently tap them into the wall at the angle set by the guides. Keep the hook flat against the wall. Stop if the surface crumbles or the hook moves.
Using alternative wall fixings? Follow their manufacturer’s fitting instructions and load limits.
-
Add bumpers & hang
Peel the backing from two foam bumpers and stick one to each of the two lower back corners of your frame. They help protect the wall and keep the frame steady.
Lift the frame onto the hook, making sure the cord is fully seated. Support the frame while you check it is secure, then lower its weight gently. Use a spirit level to straighten it.
One last look
Secure, straight & ready to enjoy.
- D-rings and screws are firm in the frame.
- Cord is secure, undamaged and seated on the hook.
- Wall fixings are firm and suitable for the weight.
- The frame is level and the bumpers touch the wall.
Check the fittings and cord periodically, and whenever you move the picture. Replace anything loose, worn or damaged.
Keep out of reach of children. Contains small parts (choking hazard) and cord (strangulation risk). This kit is not a toy.